Black and White Wednesday - Week#14 - Bread Fruit

Wednesday, October 12, 2011

Sukun (Bread-fruit)

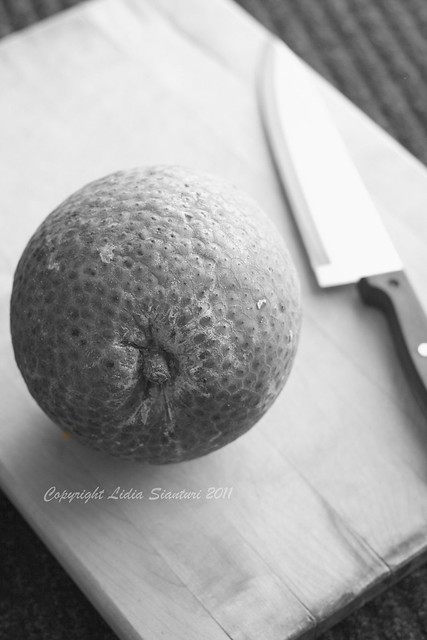
There is a particular fresh produce store here in Edmonton, called H&W produce which I really wanted to visit since 2 months ago. However, it did not happen soon...not until 3 weeks ago. Thus, I came for a short visit and instantly in love with this store..The prices are incredibly low compared to other stores. They sell various fresh and some exotic products too. On the first visit I saw this breadfruit and I recognized it as "Sukun" the name I knew back then in my hometown, but decided not to buy it, since I was not familiar with the English name and not sure whether it is the same thing as Sukun. I came home and started googling for this name and found out yes it is! I made another visit, unfortunately they were sold out. Eventually, on my third visit, I was able to buy one. It is a little bit pricey (of course..it is an exotic product and can not be found easily), 3.49$/Lb..but still I wanted to buy it since I had not had it for almost 6years.
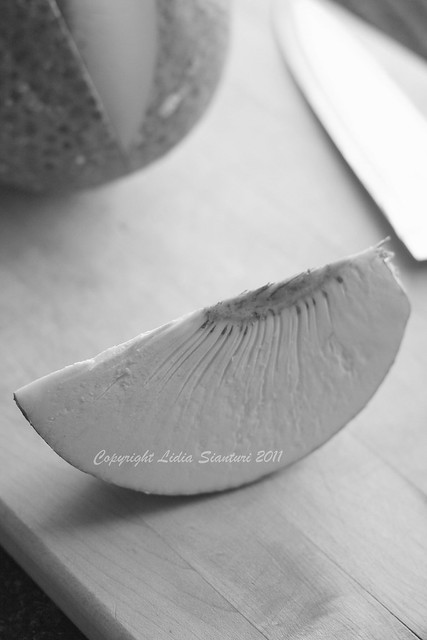
I want to share this picture for Black and White Wednesday, a weekly culinary photo event. And in case you are wondering how the inside look like, here is another picture of a slice of the breadfruit. Stay tune if you wanna know how I cook this, I will post the recipe soon.

Sukun (Bread-fruit)

Black and White Wednesday - Week#13 - Eating Under This Beauty

Wednesday, October 5, 2011

Beautiful Mozaic

Whenever we dine in a restaurant, I always make time to explore the interior design. The painting, flowers, and lights. So I took this picture last year when we dined in at the Old Spaghetti Factory, here in Edmonton. I love this specific mozaic pattern on the light cover, and want to share this beauty to the Black and White Wednesday, a weekly photography event. What a wonderful time we had while eating under this beauty.

Rose Fondant - Tutorial

Monday, October 3, 2011

Rose cupcake

The other day I made a set of rose cupcakes for my dear friend's birthday and have promised to my readers that I will post a tutorial on how to make the rose fondant. To keep that promise, here is a simple step by step on how to prepare rose and leaf fondant.

What you need:
Some rolled fondant, colored as prefer
Sharp knife
A ziploc
Veining tool

Rose1

1: roll a long cylinder as shown on the picture
2: make 4 same size cuts
3: roll the first three into round balls and the last one into a cylinder

Rose2

4: place them inside a ziploc.
5: flatten each of them using your thumb.
6: Take out the cylinder one and roll it from one side.

Rose3

7: continue to roll to the other side
8: The result will look like "stigma"
9: Take one of the flatten round shape, and wrap around the "stigma".

Rose4

10: Take the second flatten round shape and place it overlap to the first one.
11: Do the same thing as for the last round shape.
12: Cut off the unwanted bottom part.

Rose5

And here is the result....

leaves

Now to make the leaf.
1: Make round shape of green colored fondant, then rolled it on palm of hand to form an oval.
2: Flatten the oval, make adjustment of the leaf shape using your finger as needed. Then mark the long centre part using veining tool.
3: Mark the margin with veining tool as shown on the picture.

Leaves

Here is a complete picture of the process of making the leaf.
Simple isn't it? Now is your turn to try...Keep practicing!

Bianca's and Jordan's Mom Copyright © 2009 Designed by Ipietoon Blogger Template for Bie Blogger Template Vector by DaPino